
Air Conditioning Not Blowing Cold Air? This Could Be Why

This could be why your AC isn't blowing cold air.
A hot Boston day has a way of exposing AC problems fast. You lower the thermostat, wait for that cool air to kick in, and instead the vents push out air that feels lukewarm, weak, or not much different from the room itself.
That usually sends homeowners to the same place mentally. Is this a quick fix, or is the whole system failing?
Most of the time, the right answer starts with a calm process. A few causes are simple and safe to check yourself. Others involve refrigerant, electrical components, or parts that should only be handled by a licensed HVAC technician. Knowing the difference matters, especially when you want to stay comfortable without making the problem worse.
When air conditioning is not blowing cold air, the goal is not just to get some cooling back. The goal is to restore proper operation, protect the equipment, and avoid throwing money at the wrong repair. In communities like Mattapan, Quincy, Canton, Hanover, Dorchester, and Milton, that also means thinking about humidity, older housing stock, and the fact that many homes and multi-family buildings have a mix of central AC, ductless mini-splits, and newer heat pump systems.
Start with the easiest checks first. Confirm the thermostat is calling for cooling. Check power. Inspect the filter. Look at the outdoor unit. If those basics do not solve it, the next step is usually professional diagnosis.
Air Conditioning Not Blowing Cold Air: An Introduction for Boston Homeowners
In July and August around Boston, AC problems rarely happen at a convenient time. They show up during a muggy afternoon, after work, or right before guests come over. The house feels sticky, the bedrooms do not cool down, and every minute the system runs without lowering the temperature gets more frustrating.
The good news is that air conditioning not blowing cold air usually follows a few familiar patterns. Some are maintenance issues. Some are airflow problems. Some point to refrigerant loss or electrical failure. What matters is spotting the clues early.
What you can safely check first
A homeowner can usually inspect a few things without risk:
Thermostat settings: Make sure the system is on Cool, not Heat or Fan.
Temperature setting: Set it below the current room temperature.
Air filter condition: A dirty filter is one of the first things to inspect.
Breaker position: If the breaker has tripped, the system may have lost power.
Outdoor clearance: Leaves, debris, or overgrown shrubs can interfere with operation.
Those checks take only a few minutes, and they can save you from an unnecessary service call.
Tip: If the system is running but the air feels warm, avoid assuming it only needs “more Freon.” Air conditioners do not consume refrigerant under normal operation. Low refrigerant usually means there is a leak.
When to stop troubleshooting
A few warning signs mean it is time to call for service instead of experimenting:
Ice on the lines or indoor coil
Hissing sounds near the equipment
Repeated breaker trips
No airflow at all from the vents
Burning smells or loud mechanical noises
Those issues can involve high voltage, moving parts, or refrigerant handling. In those cases, the safest move is to shut the system off and have it checked properly.
Start with the Simple Fixes: Your Thermostat and Breaker
Before looking for a major mechanical failure, check the controls. It sounds basic, but these are the things that get missed most often in real homes.
Thermostat checks that solve more problems than people expect
Start at the thermostat and verify four things:
Mode
It should be set to Cool. If it is on Heat, Off, or Fan, the system will not cool the house.Set point
Lower the setting enough that the thermostat calls for cooling. If the room is already near the set temperature, the system may not start.Fan setting
If the fan is set to On, it may run continuously even when the AC is not actively cooling. That can make it seem like the system is blowing warm air. In most homes, Auto is the better setting for normal cooling.Batteries or screen response
If the display is blank, slow, or behaving oddly, replace the batteries if your thermostat uses them.
Programmable and smart thermostats add another wrinkle. A schedule may be overriding your manual setting, or the thermostat may not be communicating correctly with the equipment.
Breaker checks you can do safely
If the thermostat looks right and the system still is not cooling, check the electrical panel.
Your cooling system may have separate power feeds for the indoor and outdoor equipment. A tripped breaker can leave one part running while the other part stays off, which often shows up as air movement without actual cooling.
Use this approach:
Open the panel carefully: Look for any breaker that is not fully in the On position.
Reset once: Move the tripped breaker fully to Off, then back to On.
Listen and observe: See whether the system starts normally.
Key takeaway: Reset a breaker once. If it trips again, stop there. Repeated resetting can hide a larger electrical or mechanical problem.
A quick decision guide
What you notice | Likely next step |
Thermostat was on wrong setting | Correct it and wait for a cooling cycle |
Screen is blank | Replace batteries or check power |
Breaker tripped once | Reset once and monitor |
Breaker trips again | Turn system off and call for service |
Indoor fan runs but outdoor unit does not | Likely needs professional diagnosis |
These simple checks cost nothing, take very little time, and help narrow down whether you are dealing with a settings issue or a real equipment fault.
Reason 1: Clogged Air Filters and Frozen Coils
A very common service call goes like this. The AC is running, air is coming through the vents, but the house still feels sticky and warm by late afternoon. One of the first things we check is airflow, because a clogged filter can choke the system enough to stop real cooling.
Dirty or clogged air filters are one of the most common causes of weak AC performance. In more severe cases, restricted airflow can become bad enough to contribute to a frozen evaporator coil.
Here is what happens inside the system. The indoor coil needs a steady stream of warm household air passing over it. If the filter is packed with dust, pet hair, or construction debris, airflow drops, the coil temperature falls too low, and condensation starts freezing on the coil surface. Once ice builds up, the system loses its ability to pull heat from the house, so you end up with long run times and air that feels barely cool.
This shows up often in Greater Boston homes, especially in summer. Old duct systems, window-open spring pollen, pet dander, and basement air handlers that get ignored for months all add up. In homes that are transitioning to heat pumps, filter maintenance matters even more because these systems tend to run for longer stretches and depend on clean airflow to deliver steady comfort.
Why a filter issue gets expensive fast
A dirty filter is cheap. The problems it can trigger are not.
Keep running the system with poor airflow, and you can end up with icing, blower strain, higher electric bills, and service calls that could have been avoided with a basic filter change. That is one reason we tell homeowners to start here before assuming the problem is refrigerant or a failed part.
How to inspect and replace the filter
This is a safe homeowner check if you can reach the filter easily.
Turn the system off: Shut it off at the thermostat first.
Find the filter: It is usually at a return grille, inside the air handler, or in a slot near the furnace or indoor unit.
Remove and inspect it: Hold it up to a light. If it is heavily coated and light barely passes through, replace it.
Match the size: Use the dimensions printed on the frame.
Check the arrow: The airflow arrow should point toward the equipment.
Restart the system: Then give it a little time to see whether cooling improves.
If you are unsure which filter type to buy, avoid guessing with a very high-MERV filter just because it sounds better. In some systems, especially older ones common around Boston, a filter that is too restrictive can create its own airflow problem. The right choice depends on the equipment and duct design.
What to do if the coil is already frozen
If you see ice on the refrigerant line, water around the indoor unit, or little to no airflow from the vents, shut the cooling off. Set the fan to On if your thermostat allows it, which can help thaw the coil faster.
Do not keep forcing the AC to run.
If the system cools normally after a filter change and full thaw, you may have caught the problem early. If it freezes again, there is usually more going on, such as a blower problem, a blocked coil, a duct restriction, or low refrigerant. That is the point where a professional diagnosis is the safer and less expensive move.
For a practical maintenance checklist, our guide to HVAC maintenance for homeowners walks through the routine items that help prevent this kind of mid-season failure.
A good rule for Boston-area homes
Check the filter regularly during cooling season and replace it on the schedule recommended for your system and household conditions. Homes with pets, recent renovations, allergy concerns, or heavy AC use usually need more frequent changes.
It is a small job, but it protects comfort, efficiency, and the life of the equipment. In a lot of homes, this is the difference between a simple fix and a no-cooling call on the hottest weekend of the summer.
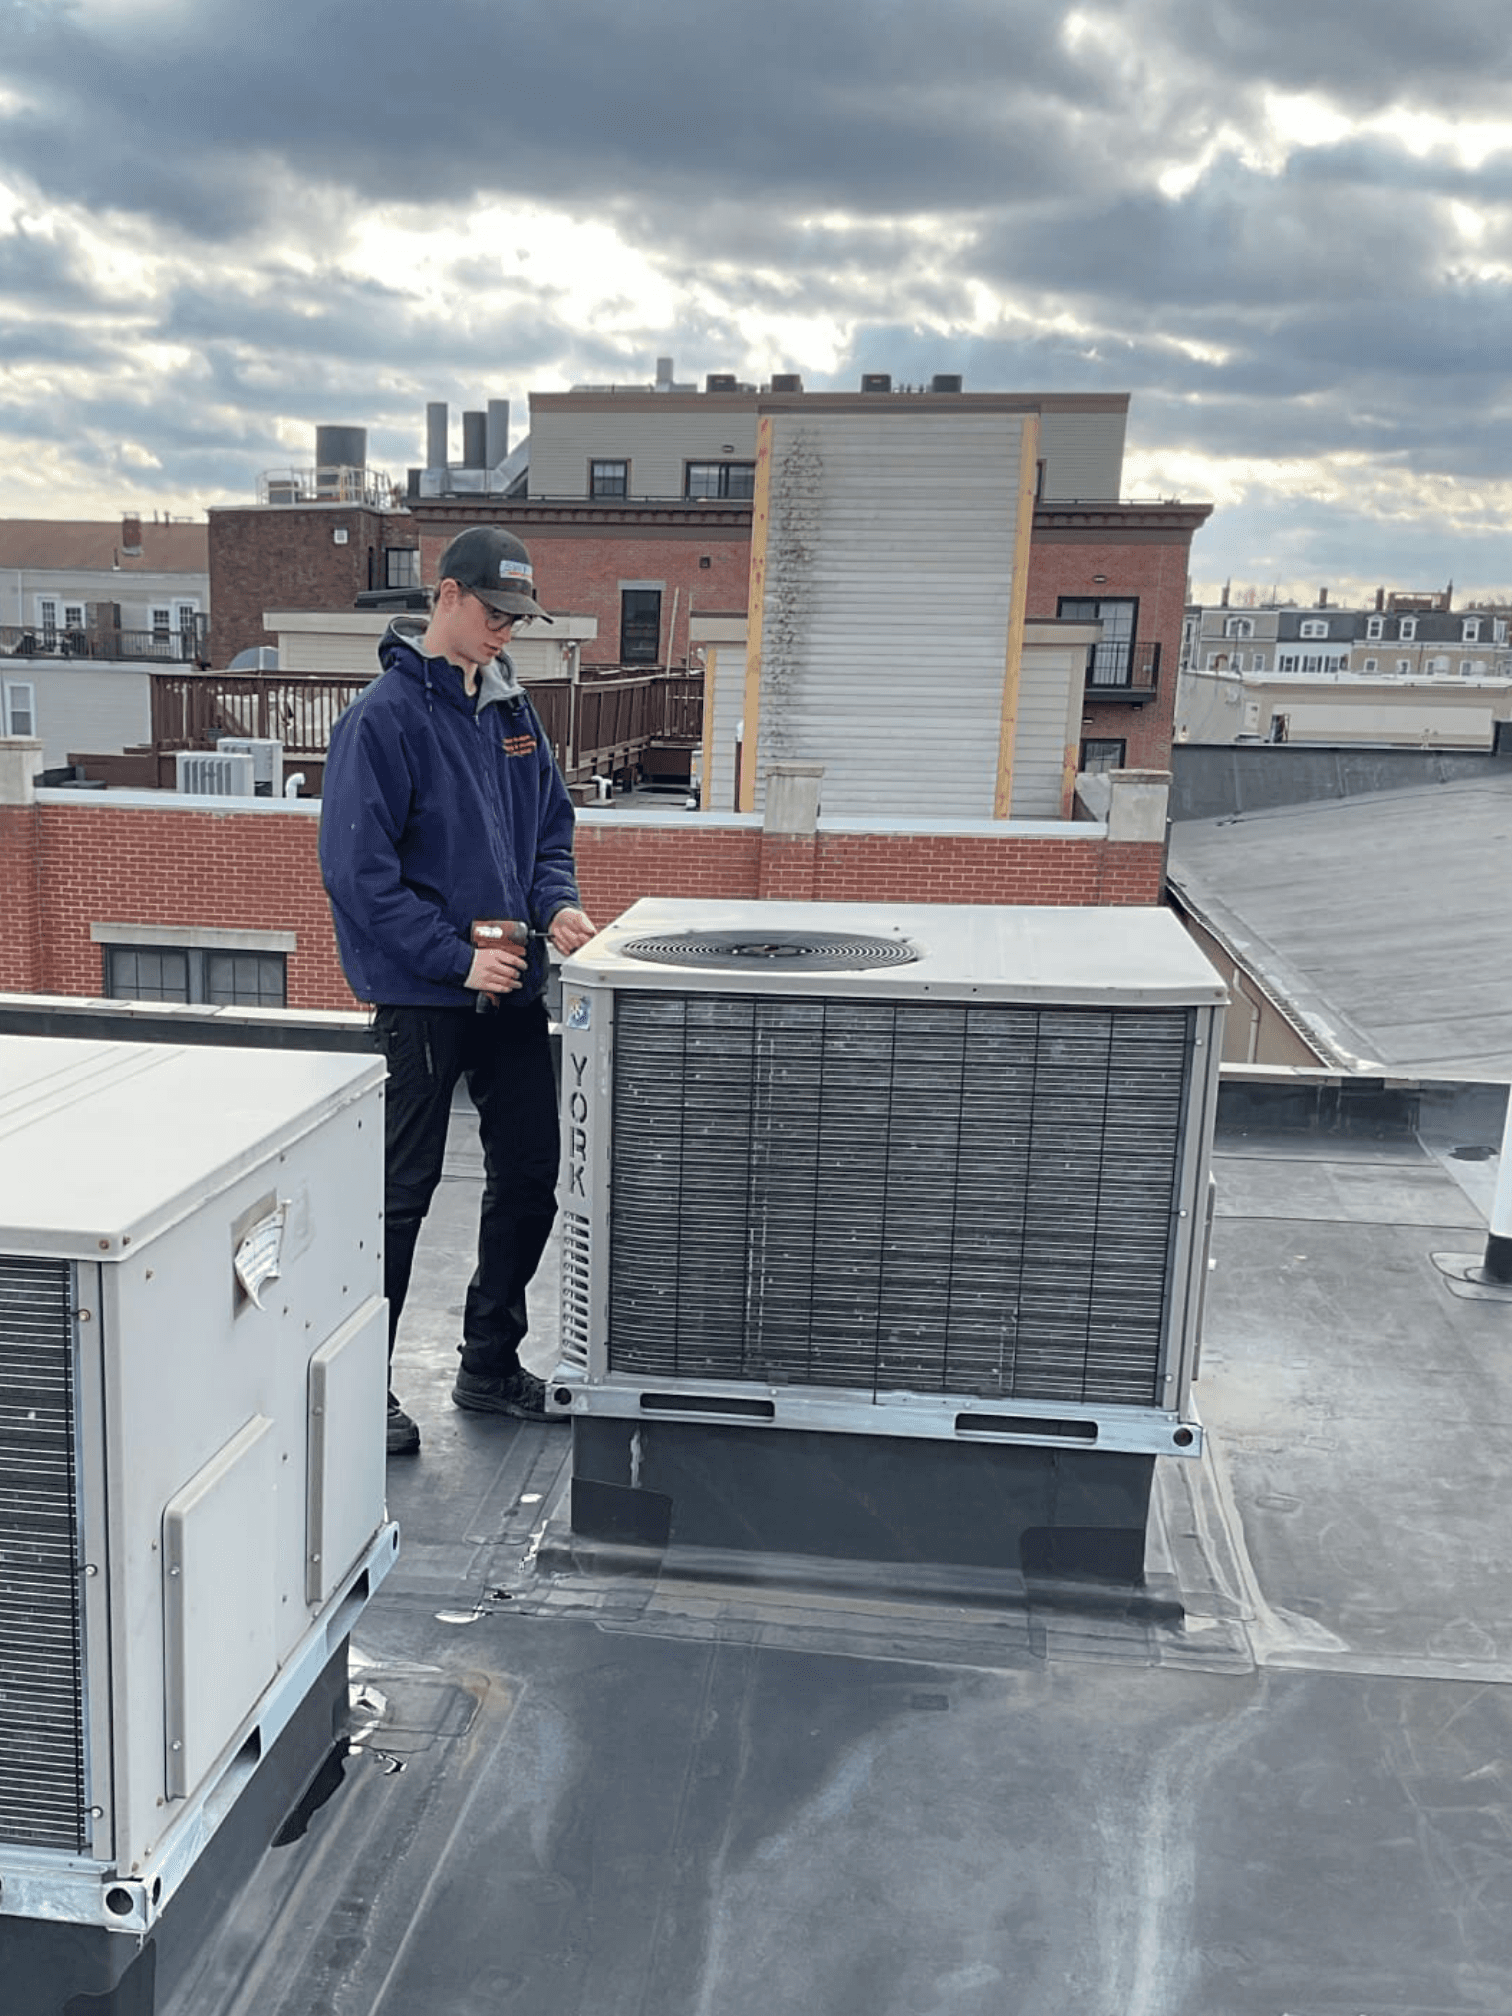
Reason 2: A Dirty or Obstructed Outdoor Unit
The outdoor condenser has one job that homeowners often overlook. It takes the heat removed from inside your house and releases it outdoors.
If that unit is coated in dirt or crowded by leaves, weeds, fencing, or bushes, it cannot shed heat efficiently. The result is familiar. Longer run times, weaker cooling, and a house that never quite catches up on a humid day.
What Boston-area homeowners commonly find outside
Around Greater Boston, outdoor units collect all kinds of debris through the season:
Spring pollen and seed fluff
Grass clippings from mowing
Leaves lodged around the base
Dust and urban grime on the coil fins
Shrubs growing too close to the cabinet
A condenser needs open airflow. When the coil surface gets blocked, the system struggles to dump indoor heat outside.
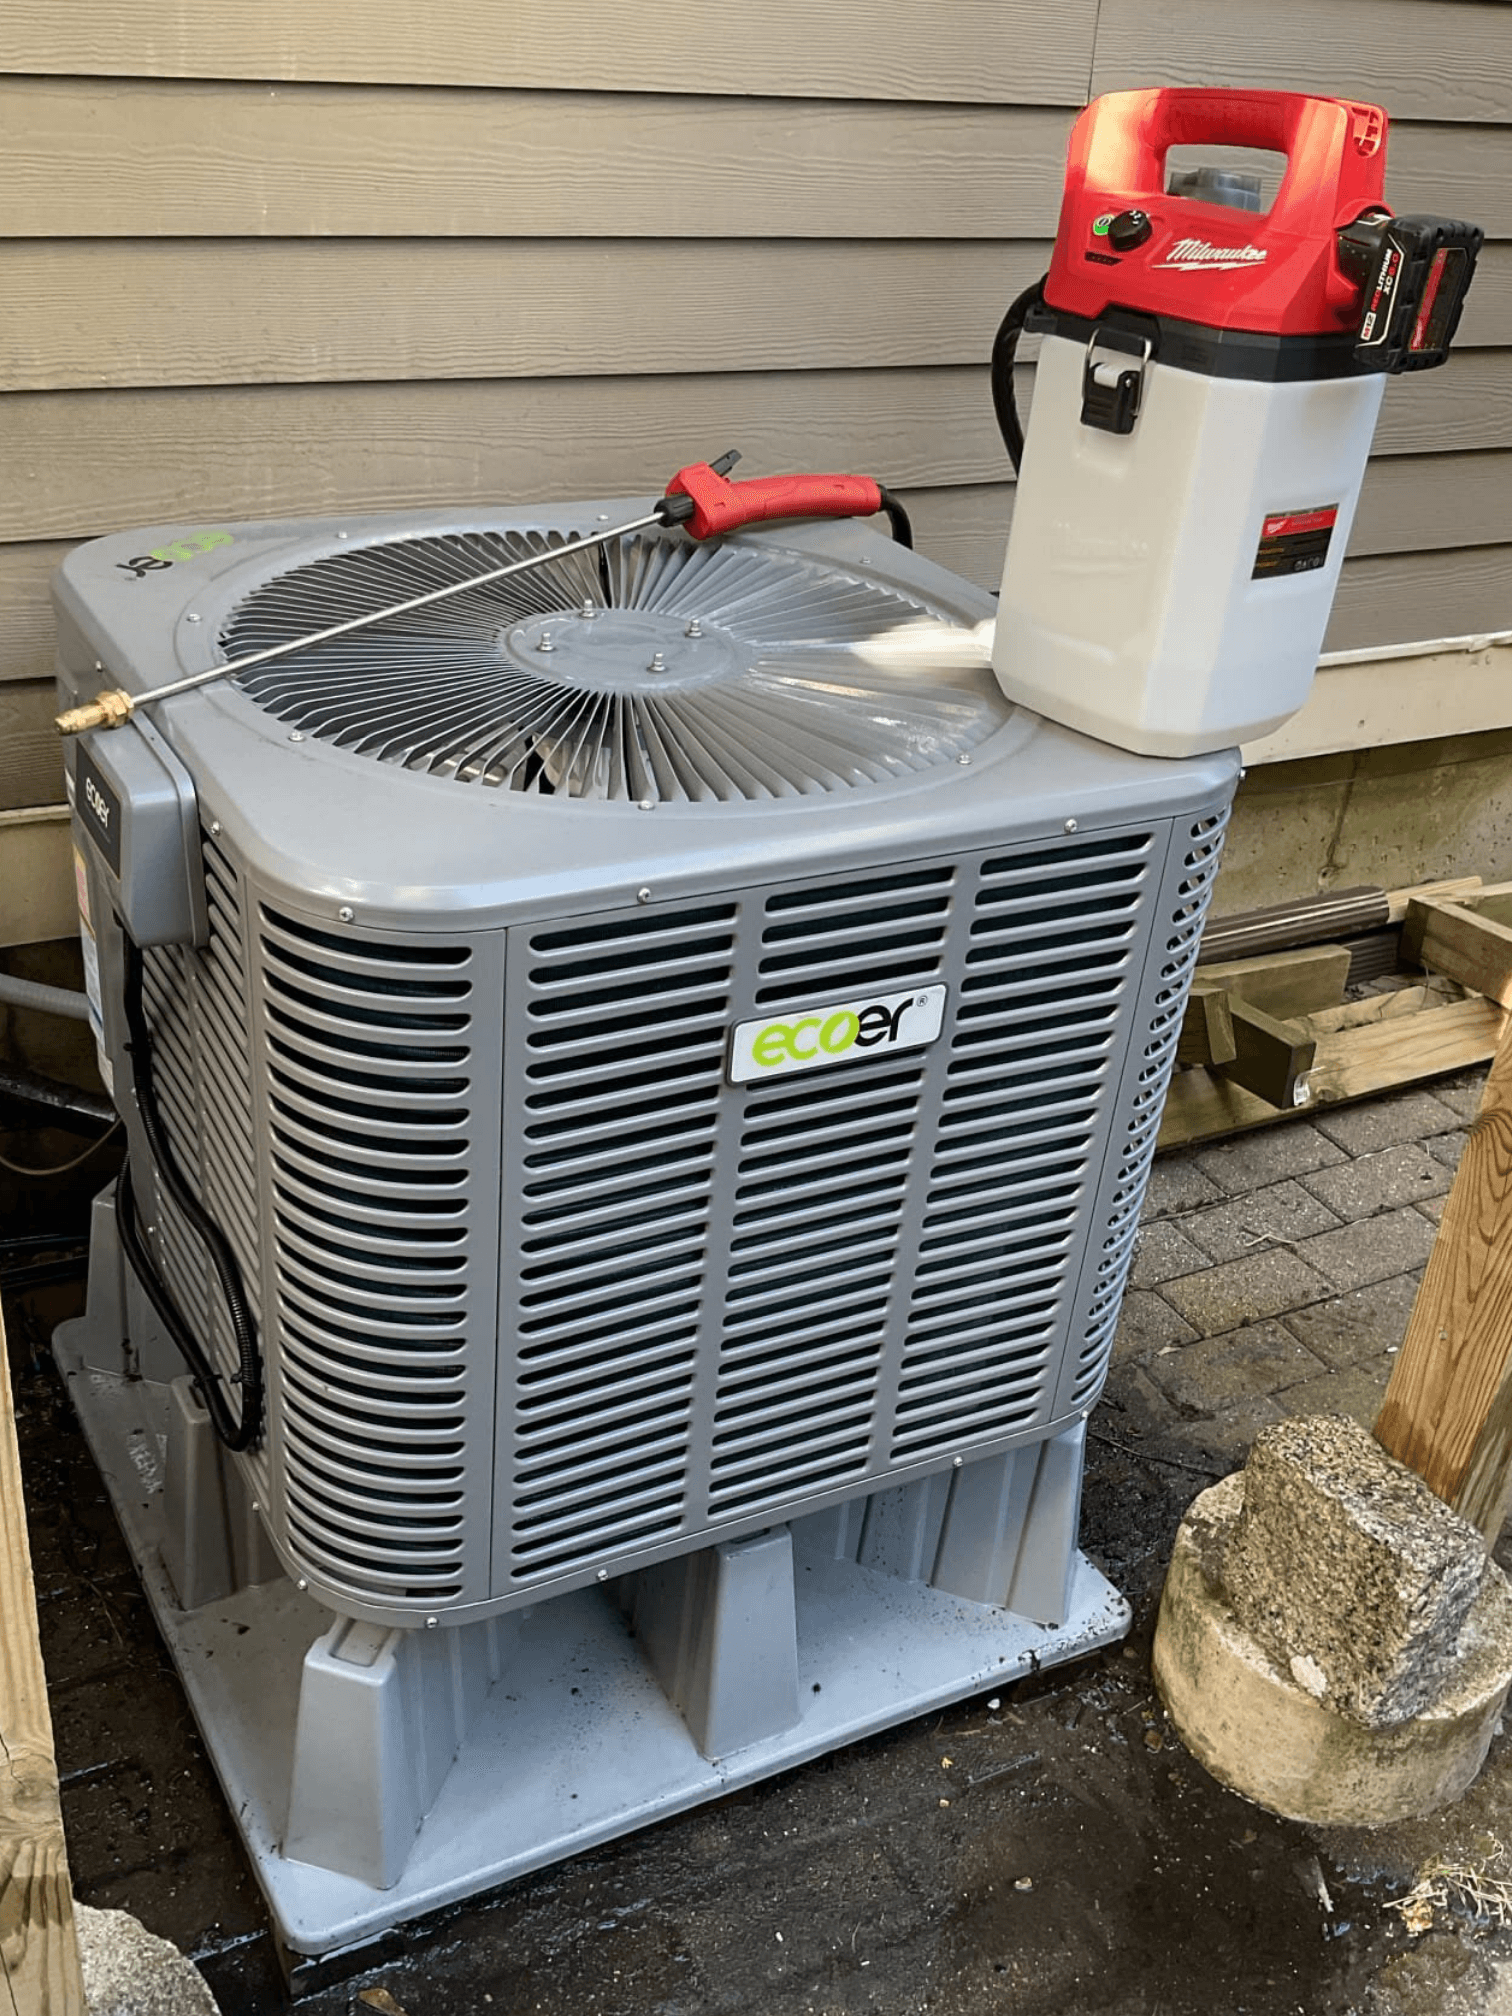
What you can clean yourself
This is one of the few outdoor tasks that is usually safe for a homeowner, as long as you stay within simple cleaning and do not open panels or handle electrical parts.
Use this process:
Shut off power
Turn the system off at the thermostat. Then use the outdoor disconnect if you can do so safely.Clear debris by hand
Remove leaves, sticks, and anything piled around the base.Trim back growth
If bushes are pressing into the unit, cut them back so air can move freely.Rinse the exterior coil gently
Use a regular garden hose, spraying from the top down. Keep the stream gentle.Let it dry, then restore power
After cleaning, turn the system back on and see whether cooling improves.
What not to do
A few mistakes cause damage fast:
Do not use a pressure washer: The fins are delicate and bend easily.
Do not pry inside the cabinet: That moves beyond safe homeowner maintenance.
Do not straighten badly crushed fins yourself unless you know what you are doing: Improper fin combing can make things worse.
Do not spray harsh chemicals into the unit: Coil cleaners should be used properly and selectively.
Key takeaway: Homeowners can safely clear space and gently rinse the outside coil. Deep cleaning, electrical inspection, and coil service inside the equipment belong in a professional tune-up.
When a dirty unit is not the only issue
Sometimes the outdoor unit looks rough because it has gone several seasons without service. Other times, it is clean enough, but the actual problem sits elsewhere, such as low refrigerant, a failed fan motor, or a weak capacitor.
A dirty condenser is worth addressing because it is visible and fixable. It is not worth assuming that cleaning alone will solve every case of air conditioning not blowing cold air.
If the system still runs warm after you clear the unit and verify the basics inside, move on to the signs of a refrigerant or component problem.
Reason 3: Low Refrigerant and System Leaks
You set the thermostat correctly, the filter is clean, and the outdoor unit has room to breathe, but the house still feels sticky by late afternoon. In that situation, one of the problems we take seriously is low refrigerant.
Low refrigerant is widely misunderstood. An air conditioner does not burn through refrigerant the way a car uses fuel. If the charge is low, refrigerant is escaping somewhere in the sealed system.
What low refrigerant does to cooling
Refrigerant is the part of the cycle that carries heat out of your home. When the charge drops, the system cannot absorb and release heat the way it was designed to, so supply air gets warmer, run times get longer, and the equipment works harder than it should.
Refrigerant leaks are a common reason homeowners end up with warm air from the vents. That matches what we see in Greater Boston. Sometimes the system still cools a little, which makes the problem easy to ignore. That delay can put added strain on the compressor, which is one of the most expensive AC parts to replace.
Signs that point to a leak
Homeowners are not expected to check pressures or diagnose charge levels, but a few warning signs are worth noticing:
Hissing or bubbling sounds near the indoor or outdoor equipment
Ice on the refrigerant line or indoor coil
Oily residue around fittings, valves, or copper tubing
Long cooling cycles with weak results
Warm air after you have already ruled out basic airflow issues
If you are seeing those symptoms, shut the system off and schedule service. Running it frozen or low on charge can turn a leak repair into a compressor repair.
Why this is always a professional repair
Refrigerant work is not a DIY project. A proper repair means locating the leak, fixing it, pressure testing if needed, evacuating the system correctly, and weighing in the charge to manufacturer specifications. Adding refrigerant without confirming the cause wastes money and often sends the same homeowner back into the no-cool cycle a few weeks later.
A licensed technician may use electronic leak detection, nitrogen pressure testing, soap solution, or dye, depending on the equipment and where the leak is suspected. If you want a plain-English overview of the symptoms before you book service, our guide to signs of an AC refrigerant leak explains what to watch for.
The 2025 refrigerant transition matters
Repair decisions are changing, especially on older equipment.
R-410A systems are entering a tougher service period as the industry shifts to newer refrigerants. For Boston-area homeowners, that means a leak on an older central AC or heat pump is no longer just a repair question. It is also a cost question. If the unit is aging, out of warranty, and leaking from a major coil, putting more money into it may not be the smartest move.
That is where local context matters. In the Greater Boston area, including Quincy, Mattapan, Dorchester, Milton, and Braintree, some homeowners are already weighing AC replacement against a heat pump upgrade through Mass Save programs. Rebates and financing can change the math. A trustworthy contractor should explain both paths clearly: what it costs to repair the existing system, how long that repair is likely to last, and whether a heat pump or ductless system makes better sense for your home.
What works and what does not
What works:
Finding the exact leak
Repairing the failed connection, coil, or component
Charging the system to the correct specification
Comparing repair cost against system age, refrigerant type, and overall condition
What does not:
Repeated top-offs without leak repair
Store-bought refrigerant cans
Guessing that warm air always means low charge
Letting the system keep running while the lines are iced over
Handled early, a refrigerant leak is often manageable. Left alone, it usually gets more expensive.
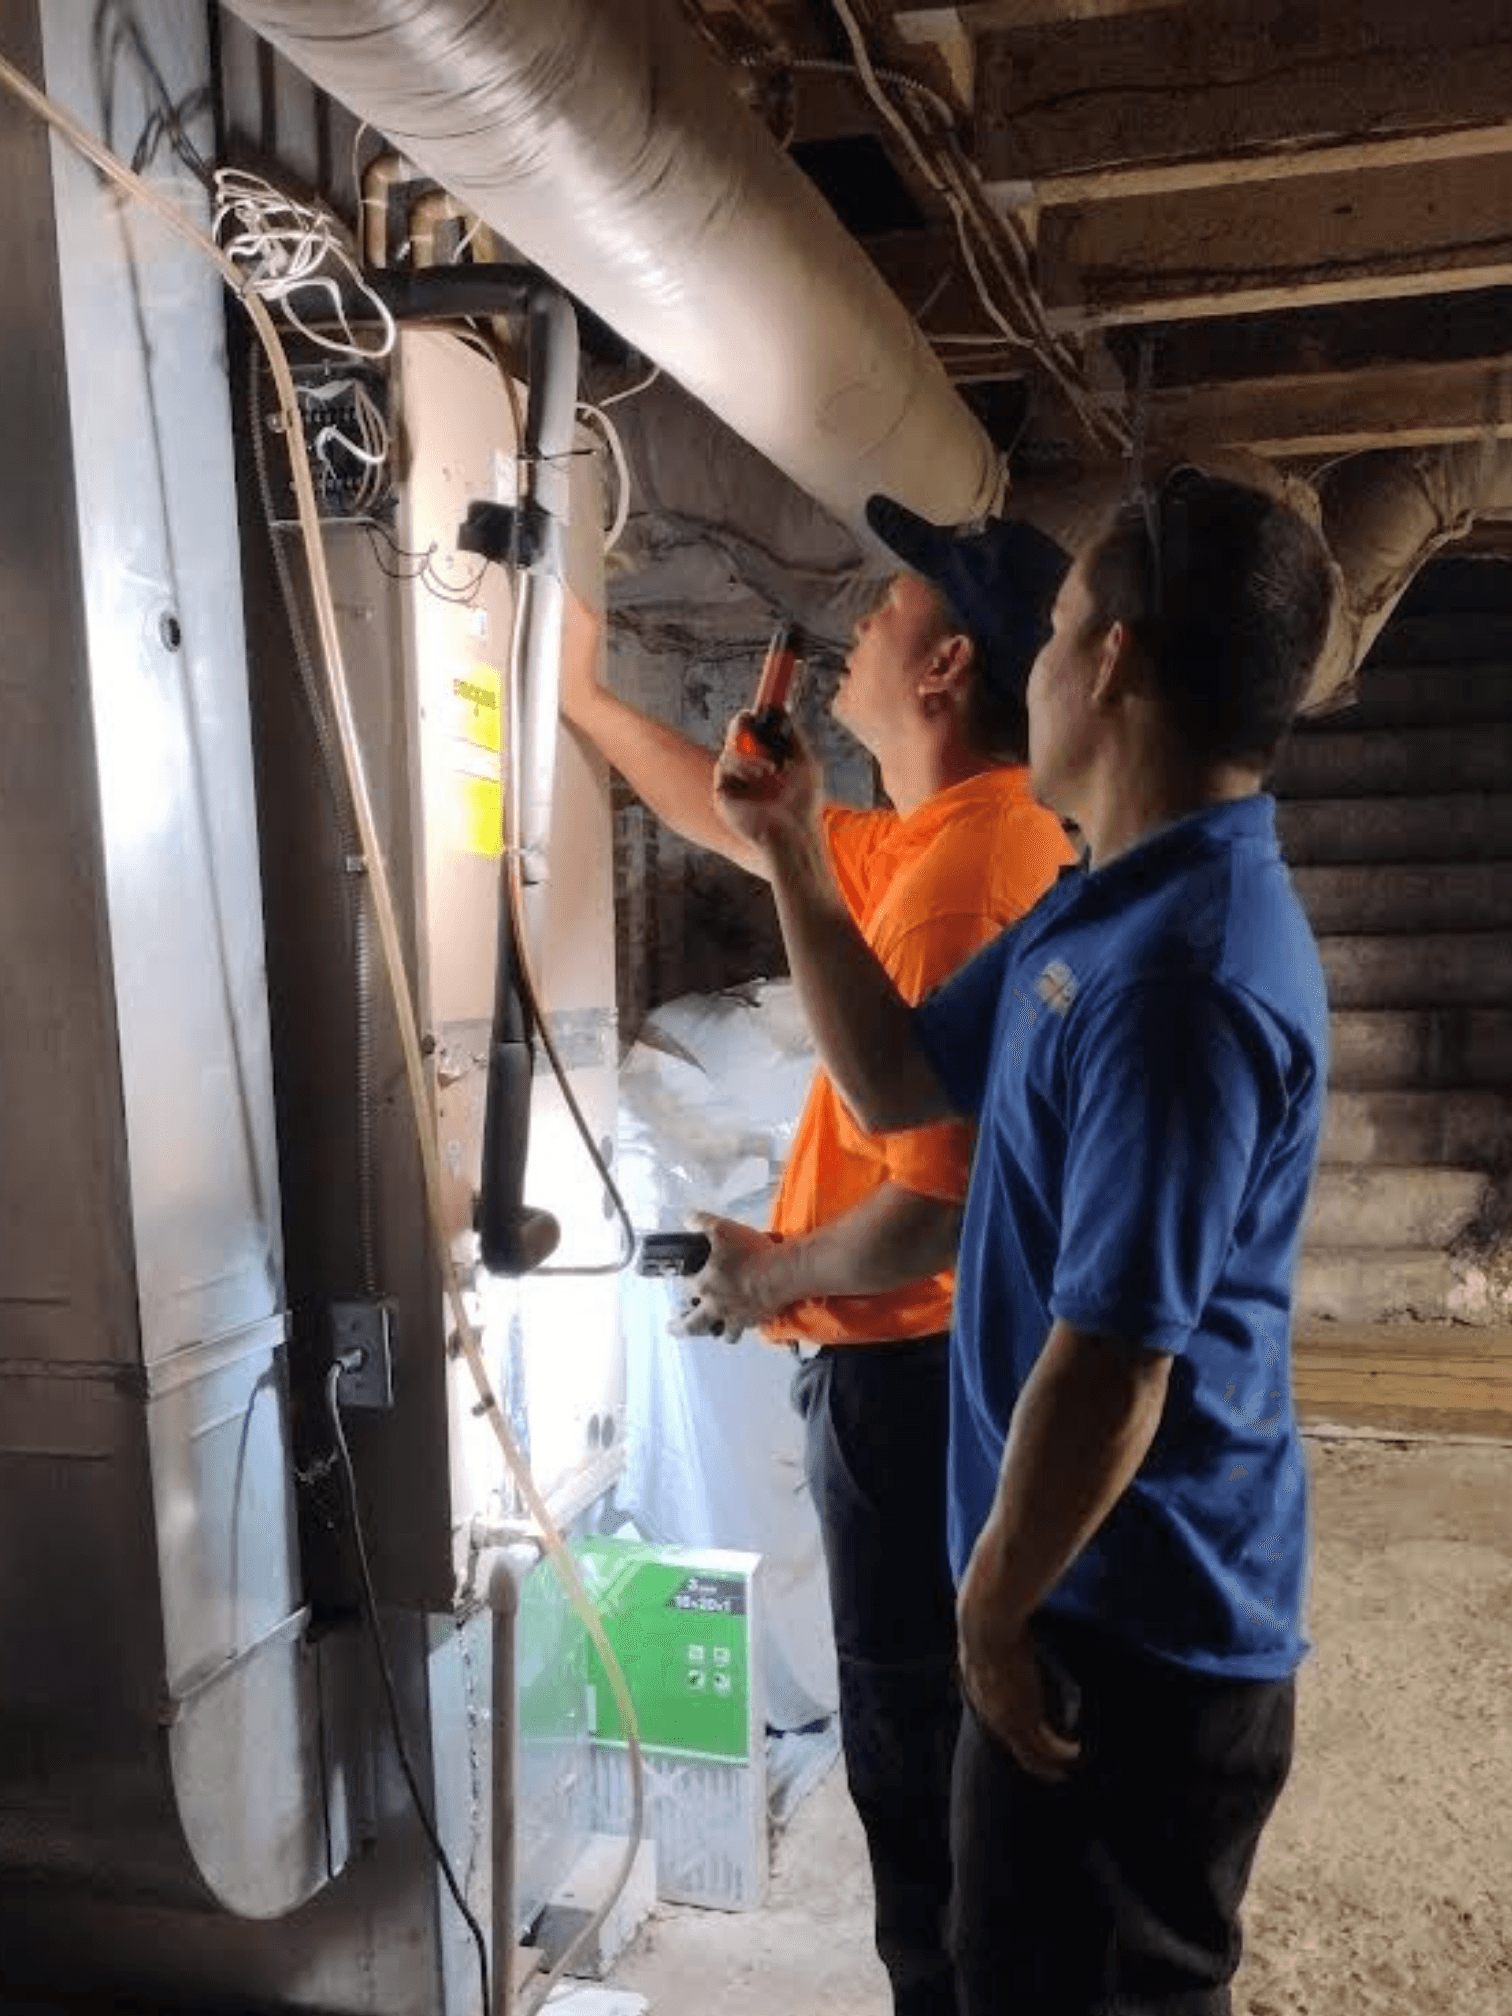
Reason 4: Advanced Mechanical and Electrical Issues
If the thermostat is right, the filter is clean, the outdoor unit is unobstructed, and the system still is not cooling, the problem may be inside the equipment itself.
These are the calls where homeowners often hear sounds that do not seem normal, or notice that one part of the system runs while another part does not. This is also where DIY should stop.
Parts that commonly fail
Several components can interrupt cooling even when the rest of the system appears to have power.
Run capacitor
A weak or failed capacitor may leave the outdoor unit humming without properly starting the fan or compressor. Sometimes the unit tries to start and fails repeatedly.
Condenser fan motor
If the outdoor compressor is running but the fan on top is not spinning, the condenser cannot reject heat properly. That can quickly push the system toward shutdown or damage.
Blower motor
If little or no air comes out of the vents, the indoor blower may not be moving air through the ductwork. Even if the outdoor section is operating, you will not get proper cooling in the house.
Compressor
The compressor is the heart of the cooling cycle. When it fails, the unit may blow warm air, trip breakers, make loud noises, or stop cooling altogether.
Symptoms that matter
Watch for patterns, not just single events.
Humming with no startup
Buzzing or clicking from the outdoor unit
Fan not spinning
No air from vents
Loud rattling, grinding, or hard-start sounds
Breaker trips that keep returning
These clues help a technician narrow the problem faster.
Safety note: Capacitors can store dangerous electrical energy even when power is off. Compressors, motors, and control components should be tested by a trained professional using the right tools.
Why prompt service usually saves money
Advanced electrical and mechanical issues tend to get worse when a homeowner keeps trying to force cooling. A struggling motor can overheat. A failed fan can let pressures rise. A breaker that keeps tripping can signal a fault that should not be ignored.
This is also where a proper tune-up earns its value. Many component failures show warning signs before a complete breakdown. Loose electrical connections, weak capacitors, dirty coils, and blocked drains often get caught during maintenance before they leave you with air conditioning not blowing cold air on the hottest week of the summer.
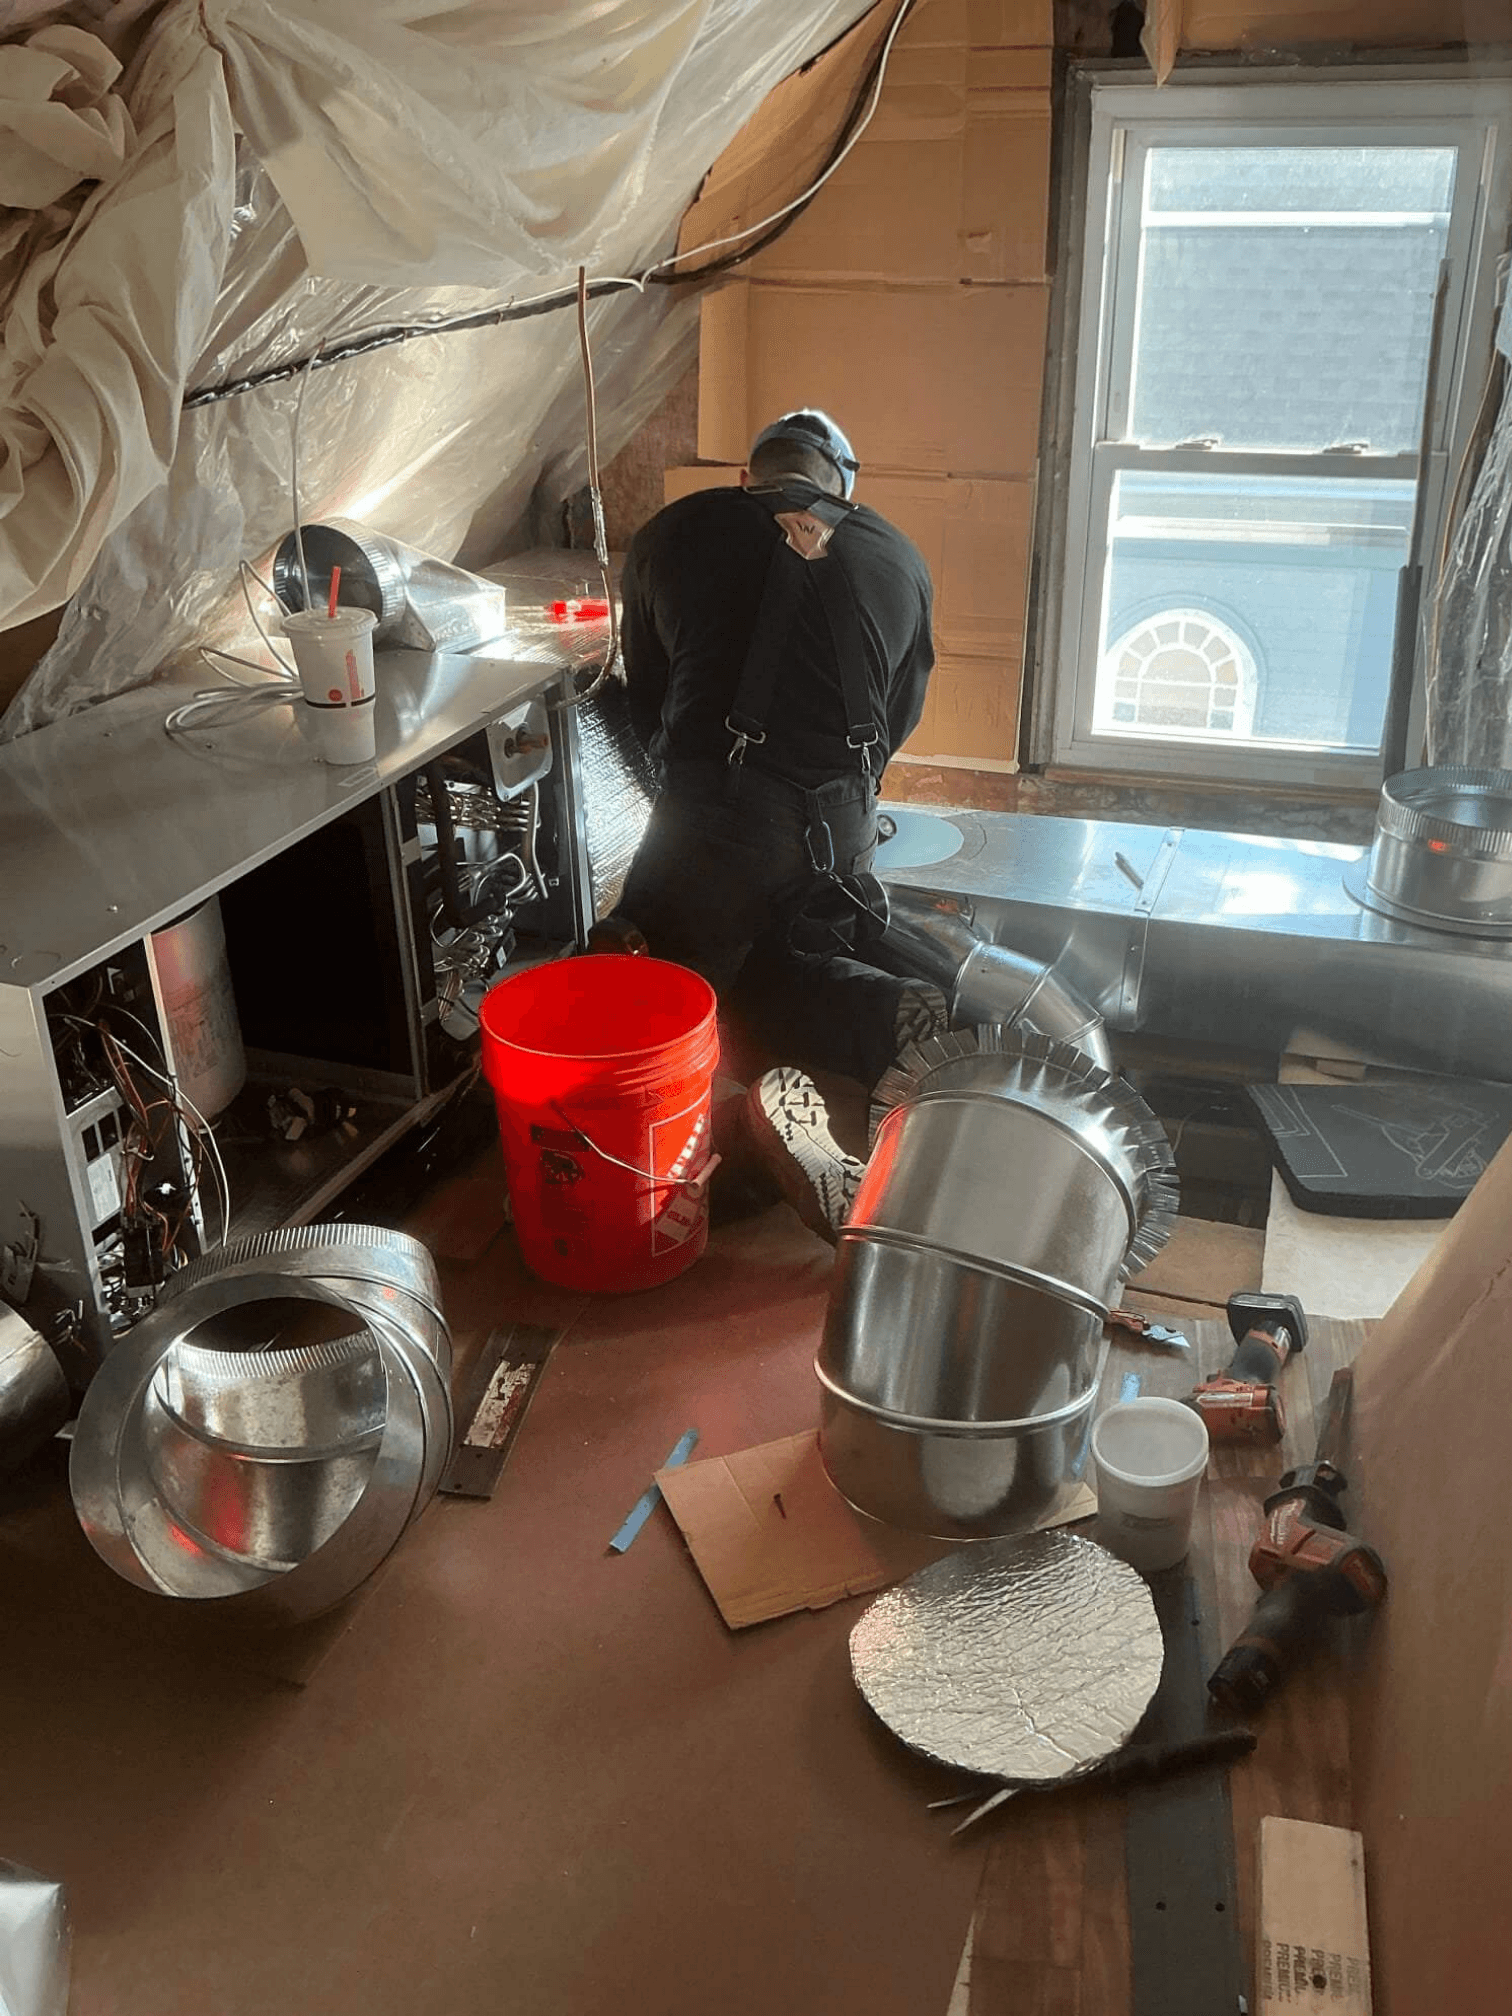
The Best Fix: Professional AC Tune-Ups in Boston
The most reliable way to avoid emergency no-cool calls is routine maintenance.
A professional tune-up catches the same kinds of problems covered above, but earlier, when they are usually simpler to correct. That includes airflow issues, outdoor coil buildup, electrical wear, drain problems, and refrigerant-related concerns that need closer evaluation.
What a tune-up should include
A real AC tune-up is more than a quick glance at the thermostat.
A solid maintenance visit typically includes:
Filter review or replacement guidance: Confirms airflow is not being choked off at the start.
Indoor coil inspection: Looks for dirt, icing history, or signs of drainage issues.
Outdoor coil cleaning: Helps the condenser reject heat properly.
Electrical testing: Checks components like capacitors, contactors, and wiring connections.
Condensate drain inspection and clearing: Reduces the chance of overflow or shutdown problems.
Thermostat check: Confirms the controls are calling correctly for cooling.
Refrigerant performance check: Evaluates whether the system appears to be operating within expected conditions.
Overall operating inspection: Looks and listens for wear, imbalance, and early signs of failure.
Each step ties directly to a common cause of cooling complaints.
Why tune-ups matter more now
The repair environment is shifting as refrigerant rules and equipment choices evolve. More homeowners are weighing whether to keep repairing older central AC systems or move toward heat pumps and ductless options.
In practical terms, that means a tune-up is no longer just seasonal housekeeping. It is also a check on whether your current system still makes sense to maintain, repair, or plan to replace.
What homeowners should expect from the visit
A good maintenance appointment should leave you with answers, not just a bill.
You should come away knowing:
Whether airflow is healthy
Whether any components are wearing out
Whether the drain system is clean
Whether cooling performance seems normal
Whether repair or replacement planning is worth discussing
One local option for this kind of service is Boston Budget Plumbing's HVAC tune-up guide, which outlines what homeowners should look for in a maintenance visit.
The trade-off most homeowners face
Tune-ups are easy to postpone because the system is still running, at least for the moment. Emergency calls happen when that gamble stops working.
The better trade-off is straightforward:
Approach | Likely outcome |
Skip maintenance and wait for failure | More surprises, hotter house, less scheduling flexibility |
Schedule routine service | Better odds of catching problems before a breakdown |
No contractor can promise that maintenance prevents every repair. Parts still fail. Systems still age. But a tune-up gives you a much better chance of finding trouble before your AC stops blowing cold air on a day when you need it most.
Tip: If your system is older, ask during maintenance whether future repair decisions may be affected by refrigerant type, parts availability, or the potential value of a heat pump upgrade.
Stay Cool This Summer with Boston Budget Plumbing
When air conditioning is not blowing cold air, the smartest move is to work from simple to serious.
Check the thermostat. Check the breaker once. Inspect the filter. Look at the outdoor unit. Those are safe homeowner steps, and sometimes they solve the issue immediately.
If they do not, pay attention to the warning signs. Ice on the lines, hissing, repeat breaker trips, poor airflow, or unusual noises usually mean the problem has moved beyond basic troubleshooting. That is when professional diagnosis saves time and often prevents a more expensive repair later.
For Boston-area homeowners in communities like Quincy, Dorchester, Milton, Mattapan, and Braintree, there is another layer to the decision now. Older systems with refrigerant leaks may not be the straightforward repair they once were. If your equipment is aging, it may be worth discussing whether a repair makes sense or whether a heat pump or mini-split upgrade fits your home better.
Boston Budget Plumbing, Heating & Cooling serves Greater Boston homeowners and small property owners with emergency repairs, seasonal tune-ups, and system replacement planning for central AC, mini-splits, and heat pumps. The team handles residential and light commercial work from its Quincy base and is known locally for clear communication, transparent pricing, and respectful in-home service.
If your air conditioning is not blowing cold air, or you want maintenance before the next heat wave, call or text (617) 644-0012. You can also schedule online through the company website and request service for diagnostics, tune-ups, or replacement options.
If your system is blowing warm air, freezing up, tripping breakers, or not keeping up with the heat, schedule service with Boston Budget. We handle AC troubleshooting, tune-ups, repairs, and replacement planning for homeowners across Greater Boston, with practical recommendations based on the condition of your system and your home.
Boston Budget is a locally owned plumbing, heating, and cooling company proudly serving homeowners in Boston, Quincy, Dorchester, Weymouth, and the surrounding communities. We specialize in boiler maintenance, heating repairs, and energy-efficient HVAC upgrade designed to keep your home safe, comfortable, and affordable, especially during harsh New England winters. With reliable service, transparent pricing, and fast response times, Boston Budget is your trusted local choice for plumbing and heating solutions.


